This tutorial explains how to:
- Set up the MCP Server endpoint to receive form submissions.
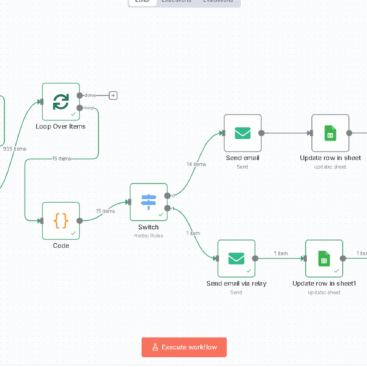
- Forward data to an n8n workflow via a webhook.
- Configure your smart form to POST data to MCP.
- Verify Google Sheets integration through n8n.
- Enable CORS for cross-domain form submissions.
1. MCP Server Overview
Your MCP server acts as a secure gateway between your website and n8n:
- Website Form → MCP → n8n Workflow → Google Sheets + Video Funnel
2. The /ai-leads Endpoint
In index.js, add this route:
jsCopyEditimport express from 'express';
import bodyParser from 'body-parser';
import cors from 'cors';
import fetch from 'node-fetch';

const app = express();
app.use(cors({ origin: 'https://mydomain' }));
app.use(bodyParser.json());

const PORT = process.env.MCP_PORT || 3000;

// AI Leads Endpoint
app.post('/ai-leads', async (req, res) => {
  try {
    const leadData = req.body;

    // Forward data to n8n webhook
    const response = await fetch('https://n8n.mydomain/webhook/ai-leads', {
      method: 'POST',
      headers: { 'Content-Type': 'application/json' },
      body: JSON.stringify(leadData),
    });

    if (!response.ok) {
      const errorText = await response.text();
      console.error('n8n Error:', errorText);
      return res.status(500).json({ success: false, error: 'Failed to forward to n8n.' });
    }

    const responseData = await response.json();
    res.json({ success: true, n8nResponse: responseData });
  } catch (error) {
    console.error(error);
    res.status(500).json({ success: false, error: error.message });
  }
});

app.listen(PORT, () => {
  console.log(`MCP Server running on port ${PORT}`);
});
3. Smart Form Integration
Updated Form Script
htmlCopyEdit<script>
document.getElementById('ai-services-form').addEventListener('submit', async function(e) {
    e.preventDefault();
    const form = this;
    const formData = new FormData(form);
    const data = {};

    formData.forEach((value, key) => {
        if (key === 'services[]') {
            data.services = data.services || [];
            data.services.push(value);
        } else {
            data[key] = value;
        }
    });

    try {
        const response = await fetch('https://mcp.mydomain/ai-leads', {
            method: 'POST',
            headers: { 'Content-Type': 'application/json' },
            body: JSON.stringify(data)
        });

        if (response.ok) {
            document.getElementById('form-status').style.display = 'block';
            form.reset();
        } else {
            alert('Submission failed. Please try again.');
        }
    } catch (error) {
        console.error('Error:', error);
        alert('An error occurred. Please try again.');
    }
});
</script>
4. n8n Workflow Setup
- Create a Webhook Node
- Method:
POST - Path:
ai-leads
- Method:
- Google Sheets Node
- Spreadsheet ID:
<your Google Sheet ID> - Range:
Sheet1!A:F - Data Mapping: jsCopyEdit
{{ [$json.body.name, $json.body.email, $json.body.company, $json.body.phone, $json.body.industry, $json.body.services.join(", ")] }}
- Spreadsheet ID:
5. Testing
- Step 1: Test the MCP endpoint: bashCopyEdit
curl -X POST https://mcp.mydomain/ai-leads \ -H "Content-Type: application/json" \ -d '{"name":"John Doe","email":"john@example.com"}' - Step 2: Submit the form and confirm data appears in Google Sheets.
6. CORS Setup
In MCP:
jsCopyEditapp.use(cors({ origin: 'https://mydomain' }));
Or configure it at NGINX level:
nginxCopyEditadd_header 'Access-Control-Allow-Origin' 'https://mydomain';
add_header 'Access-Control-Allow-Methods' 'GET, POST, OPTIONS';
add_header 'Access-Control-Allow-Headers' 'Content-Type, Authorization';
7. Next-Level Automation
Once leads are captured, n8n can:
- Send personalized video emails (via HeyGen or similar services).
- Trigger AI chatbot responses.
- Automate email campaigns.


